 |
| I found some inspiration photos on the web to look at some real natural dried earth and I started working on my 1st base. |
 First thing you need to do, and this is really important, is to prepare your surface on which you will be applying the structural paint. On the paint there is an instruction to prime the sub-surface with a Viva decor primer to make it stick but I found out that it's enough to apply some sand on your base and it will do just fine. At this stage it's important to let the pva glue dry completely before applying our crackling paint. It's a cool idea to glue some bits and rocks for decorative purpose on the base at this moment but you can do it later. Next time I'll probably put some skulls and bones on the base when I'll be doing it.
 The base has dried, now we can apply the structural paint. You can go many ways with this. The paint is quite thick, to achieve tiny crackles you should apply a really thin coat of paint but if you want some big cracks you will need to put a nice thick layer. I went with an irregular shape to make it look more natural.
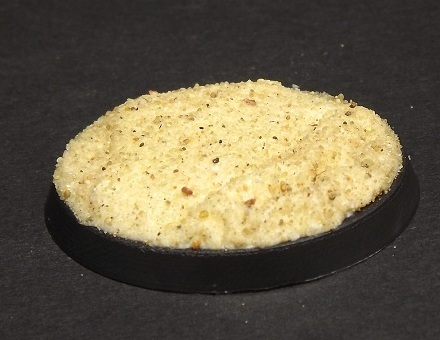
 This is how the dried paint will look like. As you can see there are smaller cracks at the fringe of the base where there was a much smaller coat of paint, and there are big cracks closer to the center where the paint was the thickest.
After we have our base all dried and crackled, it's time to paint it up. At this point, your imagination is the limit. The drybrush technique will most definitely come in handy and the washes can play a part as well. I airbrushed the whole base dark brown focusing on the gaps to be sure that they are nicely painted to represent the shadow. I think that my paint choices weren't the best here, there's room to experiment you can't go wrong with gray tones on this one.
Let's sum up. This technique will definitely find its place among some Tomb Kings, Necron Armies and I think it would fit nicely among Thousand Suns. However we don't need to stop there, it can also be useful to represent some wasteland in a diorama. In the end, it's another cool way to help us express ourselves in this hobby. Hope you find this tutorial useful. If you like it, remember to follow me on Facebook to receive updates of new articles on the blog. I leave you with some more insirational photos, go crazy and make something cool.
Brovatar.
Brovatar.


.JPG)


No hay comentarios:
Publicar un comentario